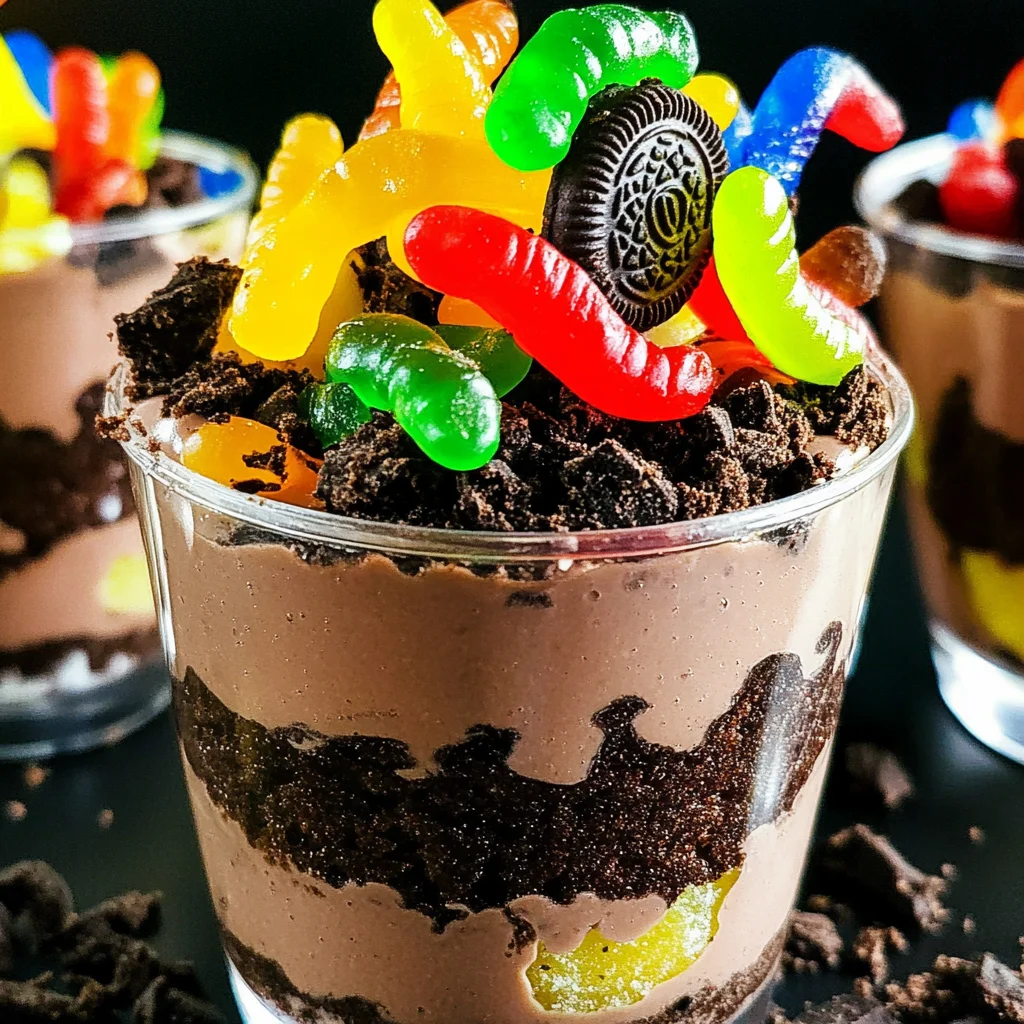
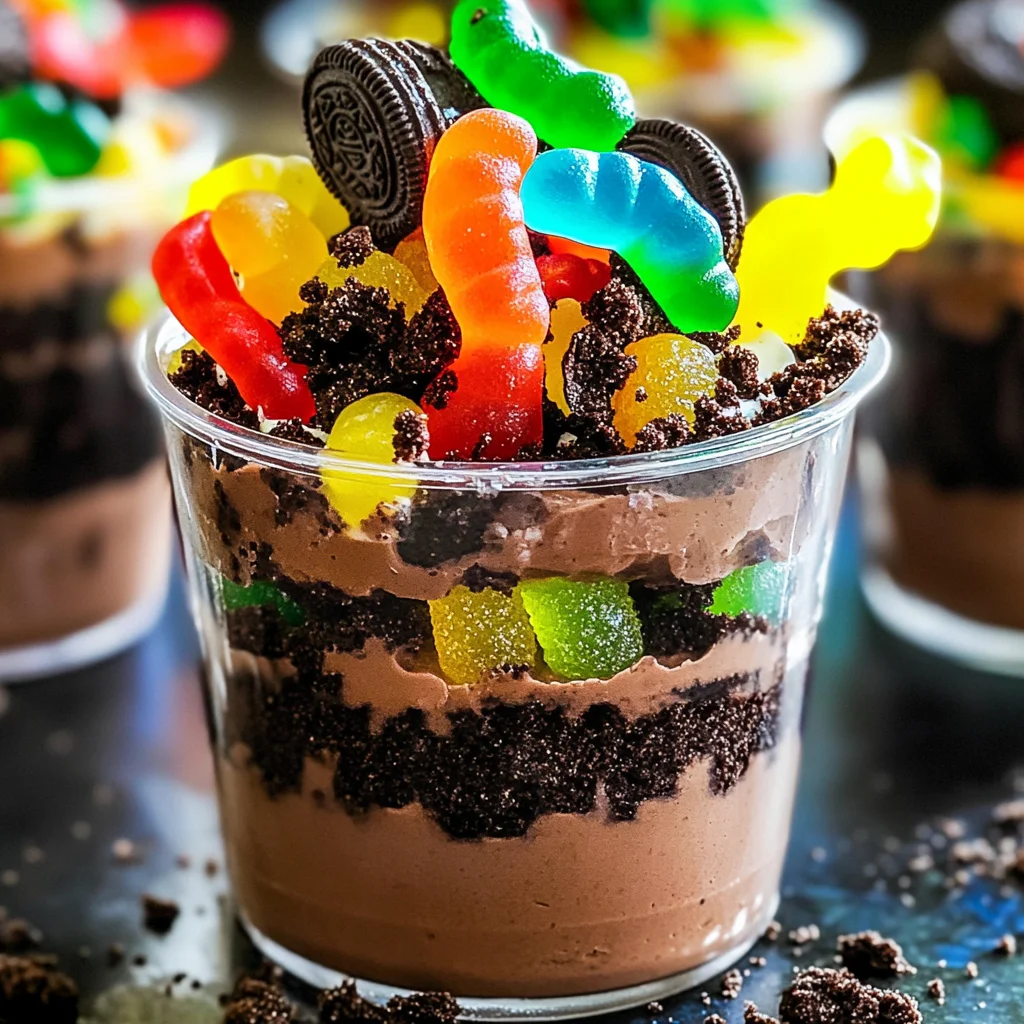
Dirt Cups
Dirt Cups are a fun and delicious dessert that kids and adults alike will enjoy! With layers of creamy chocolate pudding, crushed Oreos, and playful gummy worms, these delightful treats are perfect for birthday parties, Halloween, or just a fun family treat. Their unique combination of textures and flavors creates an unforgettable experience.
Why You’ll Love This Recipe
- Quick and Easy: With just a few ingredients and minimal prep time, you can whip up these delightful treats in no time.
- Fun Presentation: The layered look topped with gummy worms makes Dirt Cups an eye-catching dessert that’s sure to impress.
- Versatile Treat: Perfect for any occasion, from birthday parties to Halloween gatherings or a simple family dessert night.
- Kid-Friendly: This recipe is a hit with kids, making it an ideal choice for family activities or cooking classes.
- Deliciously Indulgent: The rich chocolate flavor combined with crunchy Oreos creates a mouthwatering taste that satisfies any sweet tooth.
Tools and Preparation
To make your Dirt Cups, you’ll need a few essential tools. These will help streamline the process and ensure your dessert turns out perfectly.
Essential Tools and Equipment
- Mixing bowl
- Whisk
- Glasses or cups for serving
- Measuring cups
Importance of Each Tool
- Mixing bowl: A sturdy mixing bowl allows you to combine ingredients without spills.
- Whisk: Ideal for blending the pudding mix with milk smoothly, ensuring a creamy consistency.
- Glasses or cups for serving: Clear cups showcase your beautiful layers, making the dessert visually appealing.
Ingredients
Layers of chocolate pudding, crushed Oreos topped with gummy worms!
For the Pudding Layer
- 3.4 ounces box instant chocolate pudding mix
- 2 cups milk
- 8 ounces whipped topping (thawed)
For the Topping
- 10-12 Oreo cookies (crushed)
- 32 gummy worms
How to Make Dirt Cups
Step 1: Prepare the Pudding
In a medium bowl, add cold milk and sprinkle pudding over top. Whisk until well combined. Let sit for 5 minutes to thicken.
Step 2: Fold in Whipped Topping
Gently fold in the thawed whipped topping until well incorporated. This adds creaminess to your Dirt Cups.
Step 3: Assemble the Cups
Spoon the pudding mixture into glasses or cups. Ensure each cup is filled generously.
Step 4: Add Oreo Topping
Sprinkle crushed Oreo cookies on top of the pudding layer in each cup. This adds texture and flavor.
Step 5: Garnish with Gummy Worms
Place 4 gummy worms on top of each cup for decoration. They make your Dirt Cups look playful and inviting.
Step 6: Chill Before Serving
Refrigerate until ready to serve. Chilling enhances the flavors and ensures they’re refreshing and cool when enjoyed.
How to Serve Dirt Cups
Dirt Cups are not just a delightful treat; they can also be a fun centerpiece for various occasions! Here are some exciting ways to serve them that will make your dessert even more appealing.
For Kids’ Parties
- Colorful Straws: Add vibrant straws to each cup for a festive touch that kids will love.
- Themed Decorations: Use themed decorations like mini shovels or toy insects to enhance the dirt cup experience.
At Halloween Gatherings
- Spooky Presentation: Serve in small cauldrons instead of cups for a hauntingly fun vibe.
- Gummy Worms Variety: Mix in some different gummy creatures alongside the worms for added fright!
Movie Night Treats
- Personalized Cups: Make individual servings in mason jars, perfect for cozy movie nights at home.
- Layered with Ice Cream: Scoop some ice cream on top before adding Oreo crumbs for an extra decadent treat.
Classroom Celebrations
- Mini Cup Portions: Use smaller cups for easy handling and portion control during school parties.
- Fun Labels: Create cute labels that describe the “dirt” and “worms” to add an educational twist.
How to Perfect Dirt Cups
Getting your Dirt Cups just right can elevate your dessert game. Follow these tips for the perfect presentation and taste.
- Layering: Ensure you layer the pudding, Oreos, and gummy worms well. This creates visual appeal.
- Chill Thoroughly: Let the cups chill in the fridge longer. This helps the flavors meld together beautifully.
- Garnish Creatively: Experiment with toppings like chocolate shavings or edible glitter for a dazzling finish.
- Use Fresh Ingredients: Always use fresh whipped topping and milk for the best texture and flavor.
Best Side Dishes for Dirt Cups
Pairing side dishes with your Dirt Cups can create a well-rounded dessert experience. Here are some delightful options to consider.
- Fruit Skewers: Fresh fruit on sticks adds brightness and balances the sweetness of the Dirt Cups.
- Cheese Platter: A selection of cheeses can provide a savory contrast to this sweet treat.
- Veggie Sticks with Dip: Crunchy vegetables served with ranch dip offer a refreshing crunch alongside dessert.
- Chocolate-Covered Pretzels: These salty-sweet snacks complement the rich flavors of Dirt Cups perfectly.
- Mini Cupcakes: Small cupcakes add variety and can be decorated to match your theme, enhancing the dessert table.
- Popcorn Bar: Offer flavored popcorn varieties as a fun snack option that’s easy to grab between bites of Dirt Cups.
Common Mistakes to Avoid
Making Dirt Cups can be fun and easy, but there are common mistakes that can affect the final result. Here are some tips to ensure your dessert turns out perfect.
- Using warm milk: Always start with cold milk for the pudding mix. Warm milk can prevent the pudding from thickening properly.
- Overmixing whipped topping: Gently fold in the whipped topping to maintain its light and fluffy texture. Overmixing can lead to a dense mixture.
- Skipping the chilling step: Allow your Dirt Cups to chill before serving. This helps the flavors meld and gives a better overall texture.
- Not crushing Oreos finely enough: For a better texture, crush Oreos into fine crumbs rather than large chunks. This ensures an even distribution over the pudding.
- Neglecting portion control: Be mindful of serving sizes; it’s easy to go overboard with these delicious treats! Use smaller cups if necessary.
Storage & Reheating Instructions
Refrigerator Storage
- Store in airtight containers to keep them fresh.
- Dirt Cups can last up to 3 days in the refrigerator.
Freezing Dirt Cups
- You can freeze Dirt Cups, but it’s best to freeze without gummy worms on top.
- They can be stored in freezer-safe containers for up to 1 month.
Reheating Dirt Cups
- Oven: Not recommended as it may alter the texture of the pudding and whipped topping.
- Microwave: Use low power settings to gently warm; avoid overheating as it may spoil the dessert.
- Stovetop: Not advisable; this method may cause uneven heating and ruin consistency.
Frequently Asked Questions
Here are some frequently asked questions about Dirt Cups that may help you while preparing this delightful dessert.
What are Dirt Cups?
Dirt Cups are a fun dessert made with layers of chocolate pudding, crushed Oreos, and gummy worms, making them visually appealing and delicious.
Can I customize Dirt Cups?
Absolutely! You can add different toppings like sprinkles, or switch out gummy worms for other candies or fruits according to your preference.
How do I make Dirt Cups more nutritious?
Consider using low-fat or dairy-free alternatives for pudding and whipped topping. Adding fruit can also boost nutritional value while keeping it delicious!
How long do Dirt Cups last?
When stored properly in the refrigerator, Dirt Cups can last up to 3 days before they begin to lose freshness.
Final Thoughts
Dirt Cups are not only a delightful treat but also incredibly versatile. You can customize them for any occasion or holiday by changing toppings or adding seasonal flavors. Try making these fun desserts at your next gathering—you’ll surely impress friends and family with their charming appearance and irresistible taste!
Dirt Cups

Dirt Cups are a whimsical dessert that brings joy to kids and adults alike! With delicious layers of creamy chocolate pudding, crunchy crushed Oreos, and playful gummy worms on top, these delightful treats are perfect for birthday parties, Halloween, or any family get-together. Their fun presentation and indulgent flavors create an unforgettable experience that will impress guests and satisfy sweet cravings.
- Prep Time: 15 minutes
- Cook Time: None
- Total Time: 0 hours
- Yield: Serves 4
- Category: Dessert
- Method: No-bake
- Cuisine: American
Ingredients
- 3.4 ounces instant chocolate pudding mix
- 2 cups cold milk
- 8 ounces whipped topping (thawed)
- 10–12 Oreo cookies (crushed)
- 32 gummy worms
Instructions
- In a medium bowl, combine cold milk and pudding mix. Whisk until smooth and let sit for 5 minutes to thicken.
- Gently fold in the thawed whipped topping until fully incorporated.
- Spoon the pudding mixture into serving cups, filling them generously.
- Sprinkle crushed Oreos on top of the pudding layer in each cup.
- Garnish with four gummy worms on top of each cup for a playful touch.
- Refrigerate until ready to serve to enhance flavors.
Nutrition
- Serving Size: 1 Dirt Cup (150g)
- Calories: 320
- Sugar: 22g
- Sodium: 230mg
- Fat: 17g
- Saturated Fat: 8g
- Unsaturated Fat: 7g
- Trans Fat: 0g
- Carbohydrates: 40g
- Fiber: 1g
- Protein: 4g
- Cholesterol: 15mg