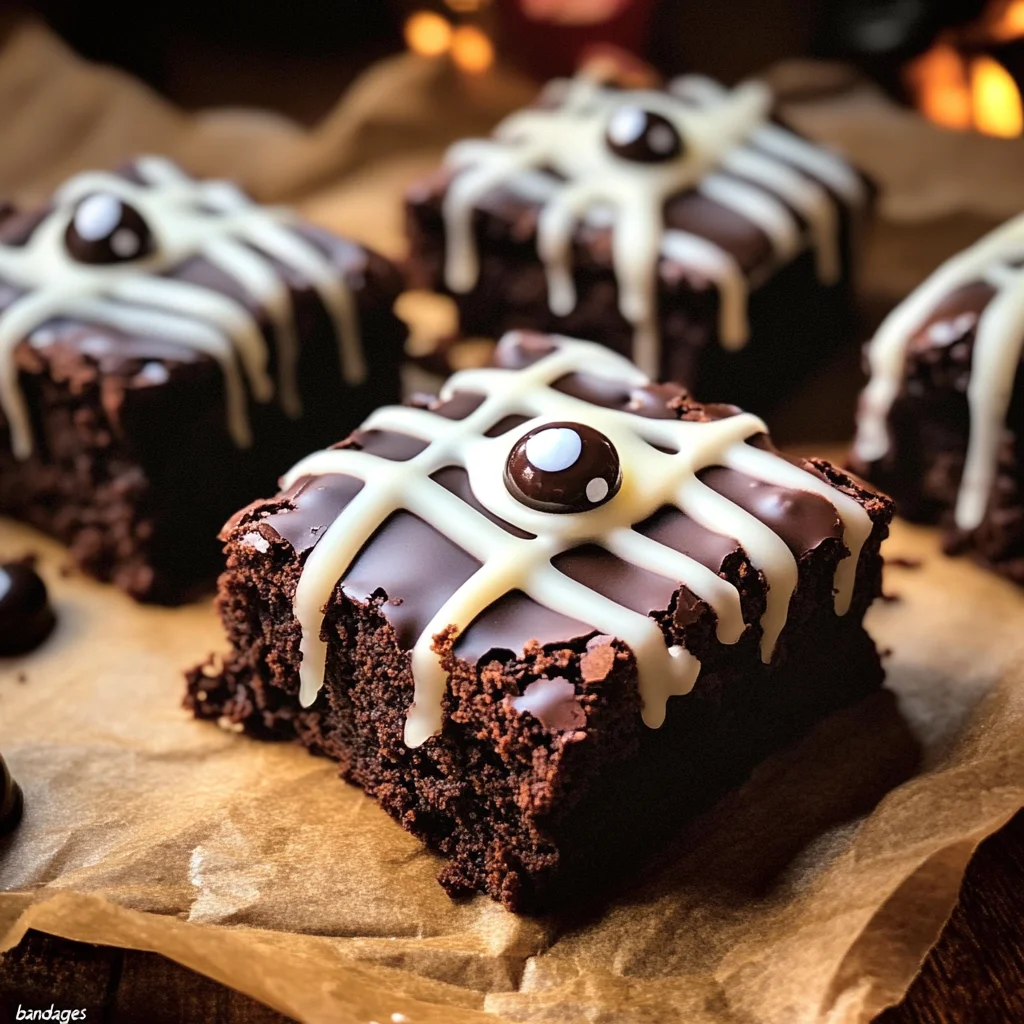
spooky mummy brownies
The spooky mummy brownies are a delightful treat perfect for Halloween or any fun gathering. With their cute mummy design and rich chocolate flavor, they capture the spirit of the season while satisfying your sweet tooth. Whether you’re hosting a party or just looking for a fun baking project with kids, these brownies will impress everyone at the table.
Why You’ll Love This Recipe
- Cute and Fun: The mummy design makes these brownies a hit at any Halloween event.
- Rich Chocolate Flavor: Indulge in the decadent taste of dark chocolate that everyone loves.
- Easy to Make: With simple steps, even beginner bakers can create these delicious treats.
- Versatile Treat: Great for parties, school events, or just as a special dessert at home.
- Kid-Friendly: Kids will love helping decorate these spooky brownies with candy eyes!
Tools and Preparation
Before diving into making your spooky mummy brownies, gather your tools and prepare your workspace.
Essential Tools and Equipment
- 9 x 9 inch cake pan
- Parchment paper
- Microwave-safe bowls
- Stand mixer (or large mixing bowl with whisk)
- Spatula
- Baking sheet
Importance of Each Tool
- 9 x 9 inch cake pan: This size is perfect for evenly baking the brownies so that they come out moist and chewy.
- Parchment paper: Using parchment makes it easy to lift the brownies out of the pan and ensures easy cleanup.
- Stand mixer: A stand mixer helps achieve that perfect frothy egg mixture quickly; however, you can use a whisk if preferred.

Ingredients
Almost too cute to eat. Honestly, I can’t eat them because they’re way too cute. But so delicious. It’s a moral battle.
For the Brownie Base
- 10 tbsp butter
- 1 1/2 cups dark chocolate chips or chunks
- 1 cup sugar
- 1/4 cup dark brown sugar
- 3 eggs, at room temperature
- 1 tsp espresso powder (optional)
- 2 tsp vanilla extract
- 3/4 cup all-purpose flour
- 1/3 cup unsweetened cocoa powder
- 1/2 tsp baking powder
- 1/2 tsp kosher salt
For Decoration
- 1 package candy eyes
- 20 oz semi-sweet or milk chocolate chips
- 1 tbsp coconut oil
- 1 cup powdered sugar
- 2-3 tbsp heavy cream, to thin
How to Make spooky mummy brownies
Step 1: Preheat the Oven
Preheat your oven to 350 degrees Fahrenheit. Line a 9 x 9 inch cake pan with parchment paper so that it hangs over the edges for easy removal later.
Step 2: Melt Chocolate and Butter
In a microwave-safe bowl, combine 1 cup of chocolate chips with the butter. Heat in the microwave for 1 minute. Stir until smooth; if necessary, heat for another 20 seconds. Whisk in both sugars until dissolved.
Step 3: Whip Eggs
In a stand mixer bowl, beat the eggs on high speed until frothy (about 2-3 minutes). Gradually pour in the chocolate mixture while mixing until smooth. Mix in espresso powder (if using) and vanilla extract.
Step 4: Combine Dry Ingredients
To the wet mixture, add flour, cocoa powder, baking powder, and salt. Mix until just combined. Gently fold in remaining chocolate chips.
Step 5: Bake Brownies
Spread brownie batter evenly in prepared pan. Bake for 25-30 minutes or until a toothpick inserted comes out with moist crumbs. Allow cooling before cutting into squares.
Step 6: Prepare Chocolate Coating
In another microwave-safe bowl, mix chocolate chips with coconut oil for coating. Heat for about one minute and stir until smooth. Let it cool slightly then line a baking sheet with parchment paper.
Step 7: Coat Brownies
Remove cooled brownies from the freezer and dip each square into melted chocolate using a fork to turn them over until fully coated. Let excess drip off and place on lined baking sheet. Refrigerate for about 15 minutes.
Step 8: Make Bandage Icing
Whisk together powdered sugar with one tablespoon of cream in a bowl. Add more cream as needed until you reach a thick but pourable consistency similar to glue. Transfer icing to a zip-top bag or piping bag.
Step 9: Decorate Mummies
Once brownies are chilled, use icing to create crisscross patterns resembling bandages on top of each brownie. Attach candy eyeballs as eyes on top of each brownie bandage design. Allow icing to harden for about 10 minutes before serving.
Enjoy your delightful spooky mummy brownies!
How to Serve spooky mummy brownies
These spooky mummy brownies are not only delicious but also a fun treat for any Halloween gathering. Here are some creative serving suggestions to make your dessert table even more festive.
Individual Treat Boxes
- Pack each brownie in a small, clear box tied with a ribbon. This makes for a delightful take-home treat for guests.
Halloween-Themed Plates
- Serve the brownies on plates featuring Halloween designs, such as pumpkins or ghosts, to enhance the festive atmosphere.
Dessert Table Display
- Arrange the brownies on a multi-tiered cake stand. Add some fake cobwebs and mini spiders around them for an eerie touch.
Pair with Ice Cream
- Offer a scoop of vanilla or pumpkin ice cream alongside each brownie. The creamy texture complements the rich chocolate perfectly.
Coffee or Hot Chocolate Bar
- Set up a station with coffee and hot chocolate. Guests can enjoy their brownie with a warm drink, making it an extra special treat.
Spooky Drink Pairings
- Serve these brownies with themed beverages like “witches brew” (green punch) or pumpkin spice lattes for a complete Halloween experience.
How to Perfect spooky mummy brownies
Creating the perfect spooky mummy brownies involves attention to detail and technique. Here are some tips to ensure they turn out amazing every time.
-
Use Quality Chocolate: The flavor of your brownies greatly depends on the quality of chocolate used. Choose high-quality dark or semi-sweet chocolate chips for rich taste.
-
Don’t Overmix: When combining the dry ingredients with the wet mixture, mix until just combined. Overmixing can lead to tough brownies.
-
Cool Before Cutting: Allow the brownies to cool completely before cutting them into squares. This helps maintain their structure and prevents them from falling apart.
-
Chill Before Coating: Freezing the brownies briefly before dipping them in chocolate makes handling easier and ensures an even coating.
-
Adjust Icing Consistency: Ensure your icing is thick enough to hold its shape but still easy to pipe. This will help create those perfect bandage designs.
-
Add Extra Toppings: Feel free to get creative with toppings! Sprinkles or crushed cookies can add texture and visual appeal to your spooky mummies.
Best Side Dishes for spooky mummy brownies
Pairing side dishes with your spooky mummy brownies can enhance the overall dessert experience. Here are some great ideas that will complement your treats wonderfully.
-
Cinnamon Apples: Warm cinnamon apples offer a sweet and spicy contrast that pairs well with chocolate desserts.
-
Pumpkin Spice Cookies: These soft cookies bring seasonal flavors that harmonize beautifully with your Halloween-themed treats.
-
Caramel Sauce: A drizzle of caramel sauce over the brownies adds an irresistible sweetness and richness.
-
Whipped Cream: Light and fluffy whipped cream can balance out the dense chocolate in these brownies, adding a refreshing element.
-
Chocolate Dipped Strawberries: Brighten up your dessert table with fresh strawberries dipped in chocolate, providing a fruity contrast to the rich brownies.
-
Nutty Trail Mix: A crunchy trail mix made with nuts, seeds, and dried fruits offers a healthy option that complements the sweet treats well.
-
Mini Cheesecakes: Bite-sized cheesecakes provide a creamy dessert option that pairs nicely with rich chocolate flavors while still being festive for Halloween.
-
Fruit Skewers: Colorful fruit skewers add freshness and color, making them an appealing side dish alongside your spooky sweets.
Common Mistakes to Avoid
To ensure your spooky mummy brownies turn out perfectly, watch out for these common missteps.
- Skipping ingredient preparation: Always measure and prepare your ingredients before starting. This prevents any last-minute rush that could lead to mistakes.
- Overmixing the batter: Mix just until combined when adding flour and cocoa. Overmixing can result in dense brownies, rather than the desired fudgy texture.
- Not cooling brownies properly: Allow your brownies to cool completely before cutting. This ensures clean cuts and better presentation.
- Ignoring oven temperature: Make sure your oven is properly preheated to 350°F (175°C). An incorrect temperature can lead to undercooked or overcooked brownies.
- Using the wrong pan size: Stick to a 9 x 9 inch pan as specified in the recipe. A different size can affect baking time and texture.
Storage & Reheating Instructions
Refrigerator Storage
- Store spooky mummy brownies in an airtight container.
- They can last in the refrigerator for up to a week.
Freezing spooky mummy brownies
- Wrap individual brownies tightly in plastic wrap or aluminum foil.
- Place them in a freezer-safe container or bag. They are good for up to 3 months.
Reheating spooky mummy brownies
- Oven: Preheat to 350°F (175°C) and warm for about 10 minutes.
- Microwave: Heat one brownie at a time for about 15-20 seconds until warm.
- Stovetop: Place a brownie in a skillet on low heat, cover, and warm for about 5 minutes.
Frequently Asked Questions
Here are some common questions about spooky mummy brownies.
How do I make spooky mummy brownies gluten-free?
You can substitute all-purpose flour with a gluten-free blend. Ensure that all other ingredients are gluten-free as well.
Can I use milk chocolate instead of dark chocolate?
Yes! Feel free to use semi-sweet or milk chocolate chips based on your preference. The flavor will be slightly different but still delicious.
How do I decorate my spooky mummy brownies?
Use icing to create crisscross patterns resembling bandages. Add candy eyes for an extra spooky touch!
What can I substitute for eggs in this recipe?
You can use flax eggs or applesauce as a vegan alternative. Use one tablespoon of flaxseed meal mixed with three tablespoons of water per egg.
How long do spooky mummy brownies last?
In the refrigerator, they last about a week, while they can be frozen for up to three months without losing flavor.
Final Thoughts
These spooky mummy brownies are both cute and delicious, making them perfect for Halloween gatherings or any festive occasion. Customize them with your favorite toppings or fillings for even more fun! Give this recipe a try, and enjoy the delightful combination of flavors that will impress both kids and adults alike.
Spooky Mummy Brownies
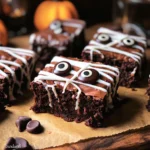
Spooky mummy brownies are a delightful and festive treat perfect for Halloween celebrations or any fun gathering. These charming chocolate creations feature a rich brownie base topped with a whimsical white icing design that resembles mummies, complete with candy eyes to bring them to life! Not only do they satisfy your sweet tooth, but they also provide an engaging baking project for families to enjoy together. With simple ingredients and easy-to-follow steps, these spooky sweets will impress both kids and adults alike.
- Prep Time: 20 minutes
- Cook Time: 30 minutes
- Total Time: 50 minutes
- Yield: Approximately 12 servings 1x
- Category: Dessert
- Method: Baking
- Cuisine: American
Ingredients
- 10 tbsp butter
- 1 1/2 cups dark chocolate chips
- 1 cup sugar
- 1/4 cup dark brown sugar
- 3 eggs
- 1 tsp espresso powder (optional)
- 2 tsp vanilla extract
- 3/4 cup all-purpose flour
- 1/3 cup unsweetened cocoa powder
- 1/2 tsp baking powder
- 1/2 tsp kosher salt
- 1 package candy eyes
- 20 oz semi-sweet chocolate chips
- 1 tbsp coconut oil
- 1 cup powdered sugar
- 2–3 tbsp heavy cream, to thin
Instructions
- Preheat the oven to 350°F (175°C) and line a 9×9 inch cake pan with parchment paper.
- Melt the butter and dark chocolate chips in a microwave-safe bowl. Stir until smooth, then mix in sugar.
- Whip eggs until frothy, then blend with the chocolate mixture along with vanilla extract.
- Add flour, cocoa powder, baking powder, and salt; mix until just combined.
- Pour batter into the prepared pan and bake for 25-30 minutes. Let cool completely before cutting.
- For coating, melt semi-sweet chocolate chips with coconut oil until smooth; dip each brownie square.
- Create bandage icing by mixing powdered sugar with cream until pourable. Decorate brownies and add candy eyes.
Nutrition
- Serving Size: 1 brownie (60g)
- Calories: 240
- Sugar: 18g
- Sodium: 150mg
- Fat: 13g
- Saturated Fat: 7g
- Unsaturated Fat: 4g
- Trans Fat: 0g
- Carbohydrates: 29g
- Fiber: 2g
- Protein: 3g
- Cholesterol: 50mg